

Hello there.
Hope everyone had a great Halloween. It’s been a bit hectic lately so we’re here to distract you for an indeterminate amount of time from the noise of the world. This month we have a little insight into a core element of Stargazing and Vicky is back with part two of Release an Alpha Build. Enjoy the read.
Stargazing Hints
A few months ago we covered collectables in the game and this month we’d like to focus some time on a core collectable that is directly tied to the gameplay.
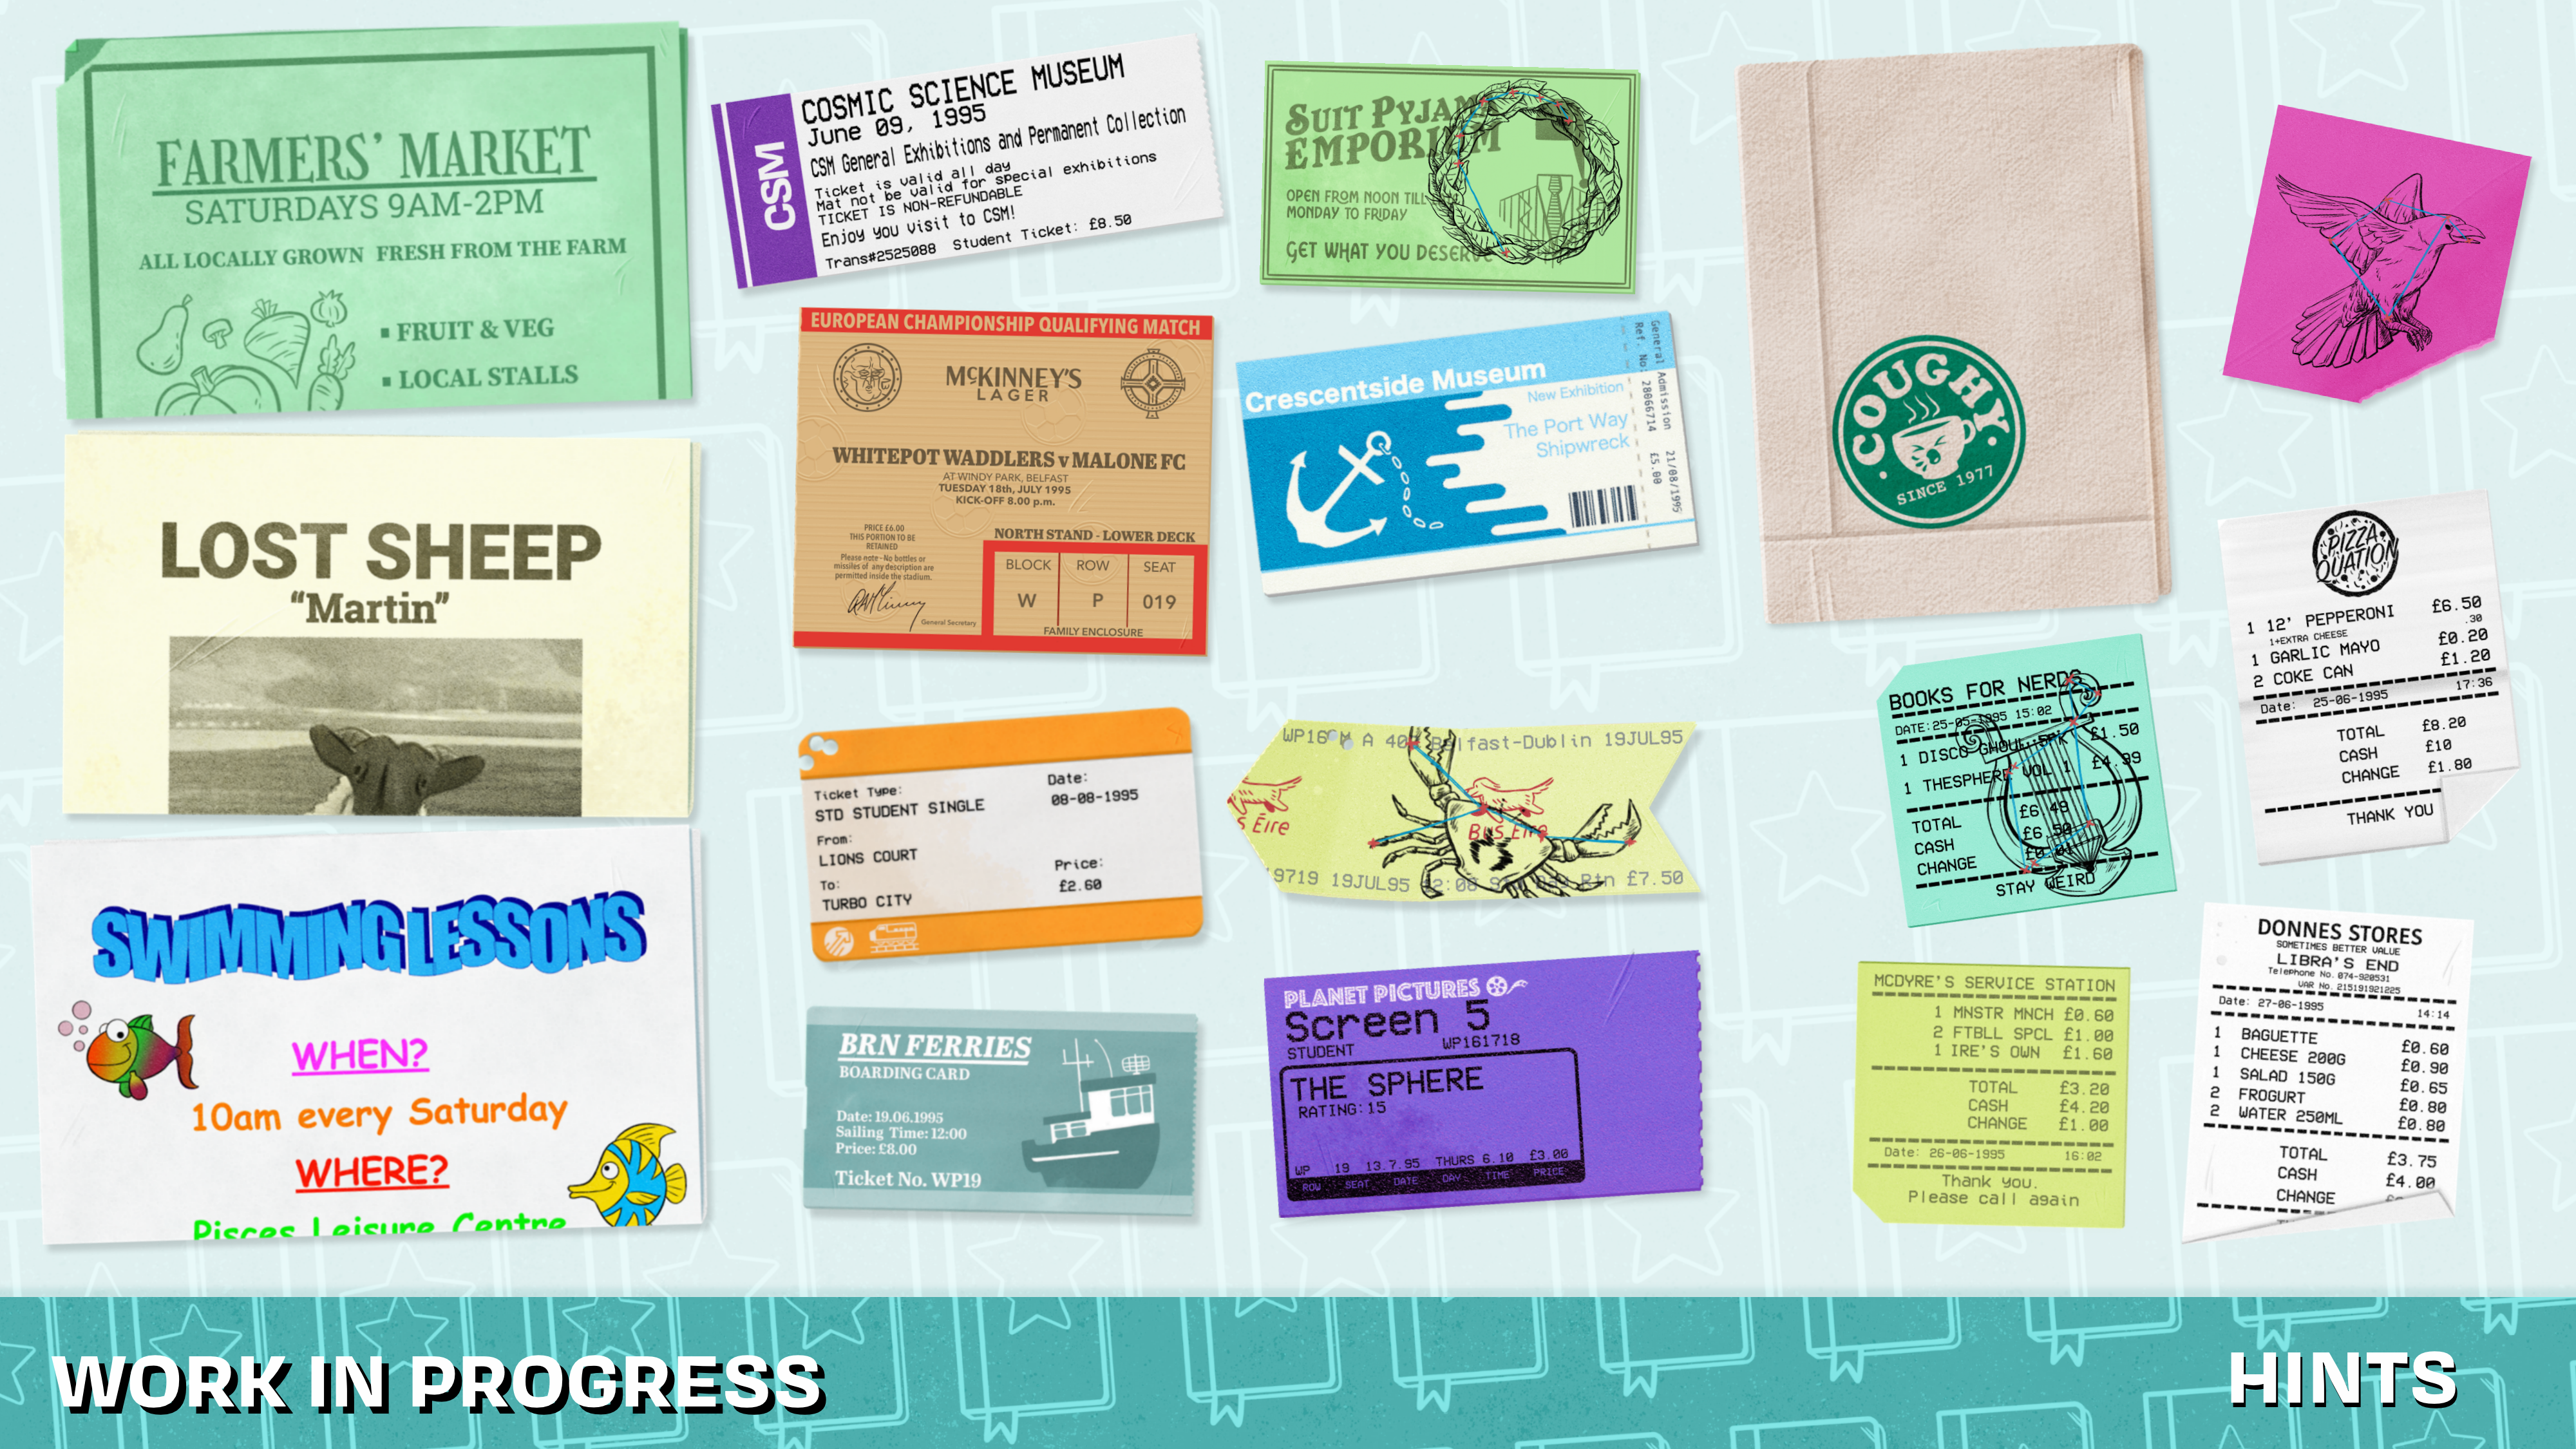
Hints in Stargazing are sketches of the constellations on a variety of items that the original owner of the notebook collected during their summer trip. There are 88 constellations in Stargazing and we wanted to try and give each constellation their own hint element. It would have been a bit of a stretch to give each constellation a unique background so we broke them down into 9 categories of hint backgrounds. Some of the categories we have are flyers, transport tickets, receipts, napkins, and event tickets. The hints given shine a little light into the life of the original owner of the book during the summer of this notebooks use.
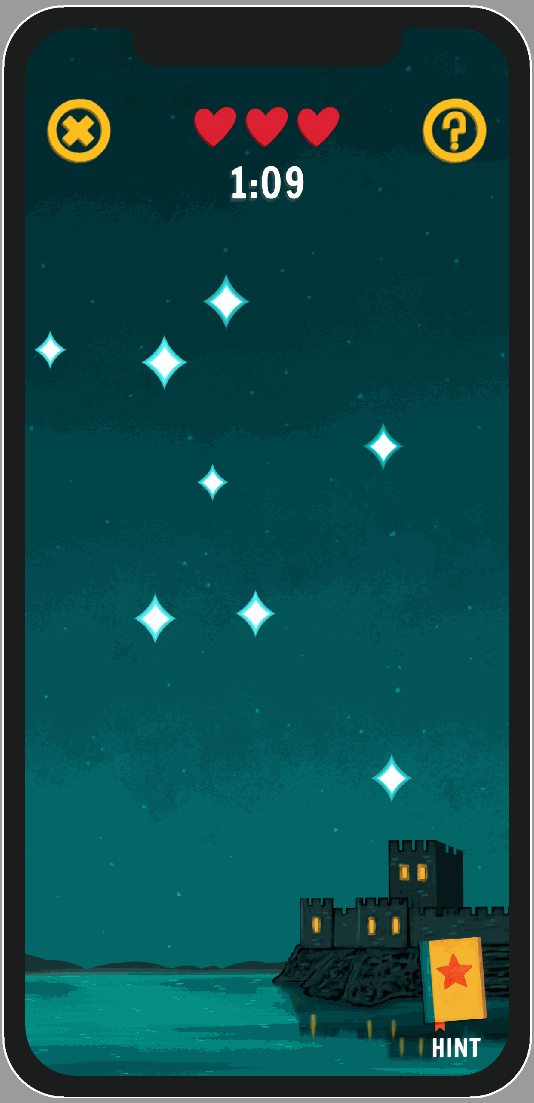
In-game these hints are accessible at any point during gameplay. Just click on the notebook in the bottom corner of the screen and inspect the hint for the path you need to follow in completing the constellation. You will be able to zoom in and move the hint to get a better view of the constellation.
Once completed you unlock a de-aged version of the ticket.
Releasing an Alpha Build – Part 2: Apple App Store
Vicky here! In last month’s blog, I wrote about how to sign up as a Google Play Developer and publish an Android app to the store. This month, we’re going to cover publishing an alpha build for testing to the iOS store, how it differs from building for Android, and what you need to know.
Since posting the last blog, I’ve found some great resources for building & publishing which I’ll signpost you to, rather than reinventing the wheel. My goal in this post is to outline those tricky things that you don’t know that you don’t know.
I’ve found Unity has some great walkthrough tutorials on how to build your iOS app to XCode and to your own device. They’re super detailed and have all the information you need, and all you need is an Apple ID: https://learn.unity.com/tutorial/building-for-mobile
However, what they don’t cover is what you do once your build is in XCode and ready to send to the store – which is the most important part! To do that, you need a Paid Apple Developer License. Again, there are great resources out there covering this, so I’ll point you in the right direction.
Before You Start – Important!
First thing is first – you need an Apple machine (e.g. a Macbook, Mac, Mac Mini, etc.) with XCode installed. You cannot do this on Windows, unfortunately.
Download and install XCode (do this early in the background, it takes forever): https://apps.apple.com/gb/app/xcode/id497799835
Unlike building for Android in Unity (which produces an ‘apk’ you can upload directly to Google), to make an iOS game, Unity spits out an XCode build. XCode is the tool you must use to build & create things for any Apple platform.
Android Method
iOS Method
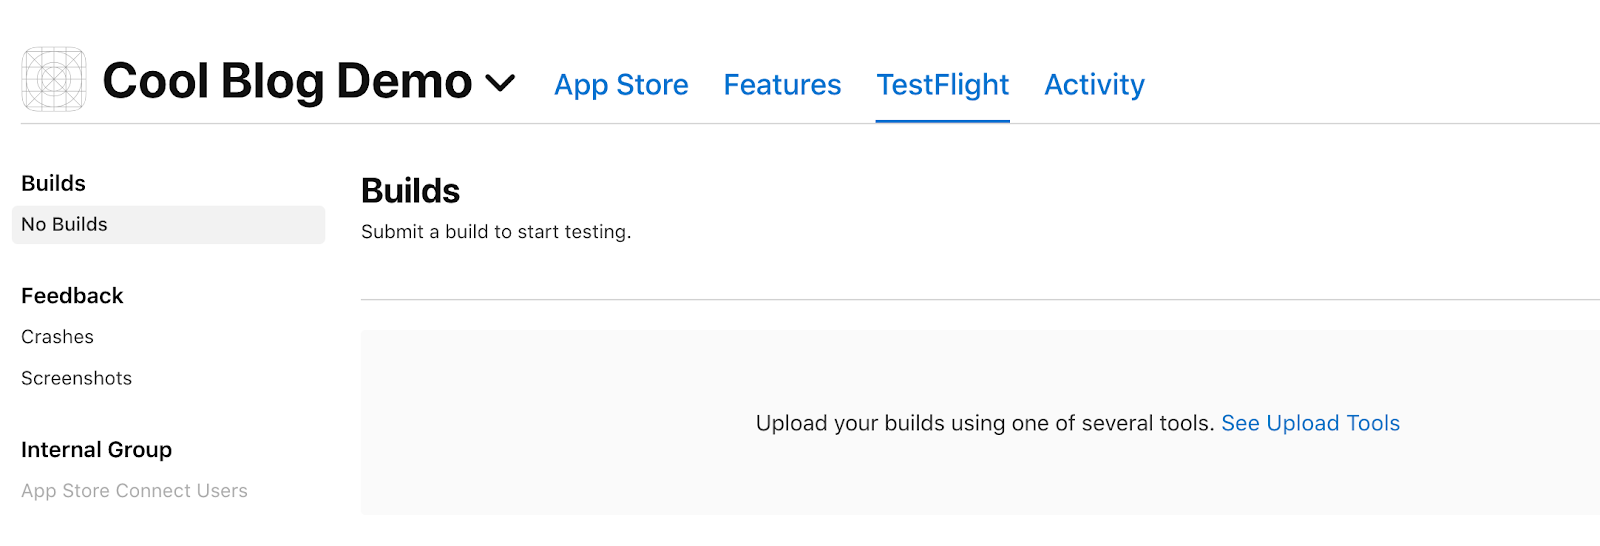
TestFlight
Players will use TestFlight to test your build. Before you can give external players (e.g. testers who have signed up and are outside of your company) TestFlight access, your alpha build will need to be manually reviewed by an Apple employee. Make sure you allocate time for this, as it can take anything from a few minutes to a few days.
More about TestFlight here: https://developer.apple.com/testflight/
Signing up as an Apple Developer
You need a paid developer account to use App Store Connect (https://appstoreconnect.apple.com – formerly iTunes Connect) – the Apple equivalent of the Google Play Developer Console.
I recommend having two separate Apple IDs – your personal one, and a developer one. If you don’t have one, sign up here: https://appleid.apple.com/account.
Again, if you are just using your Apple ID in XCode without being enrolled in the Apple Developer Programme, what you can do is limited. The differences between these two are outlined on the Apple membership page (https://developer.apple.com/support/compare-memberships/), but basically the free version does not let you distribute your app to the store or do beta tests – but you can still build to your own device.
Enrol in the Apple Developer Programme here: https://developer.apple.com/programs/enroll/.
Recap: If you’re a business (rather than an individual) signing up for an Apple Developer License, be sure to know what your D-U-N-S number is – you might even already have one without knowing it. It’s an ID for businesses handled by an organisation called Dun and Bradstreet.
App Store Connect Setup
Congratulations – you can now create iOS apps in the App Store Connect portal! We’re going to submit a FREE app for now with no in-app purchases for simplicity, but make sure you navigate through the portal and accept any outstanding terms & conditions or developer agreements that could hamper upload progress.
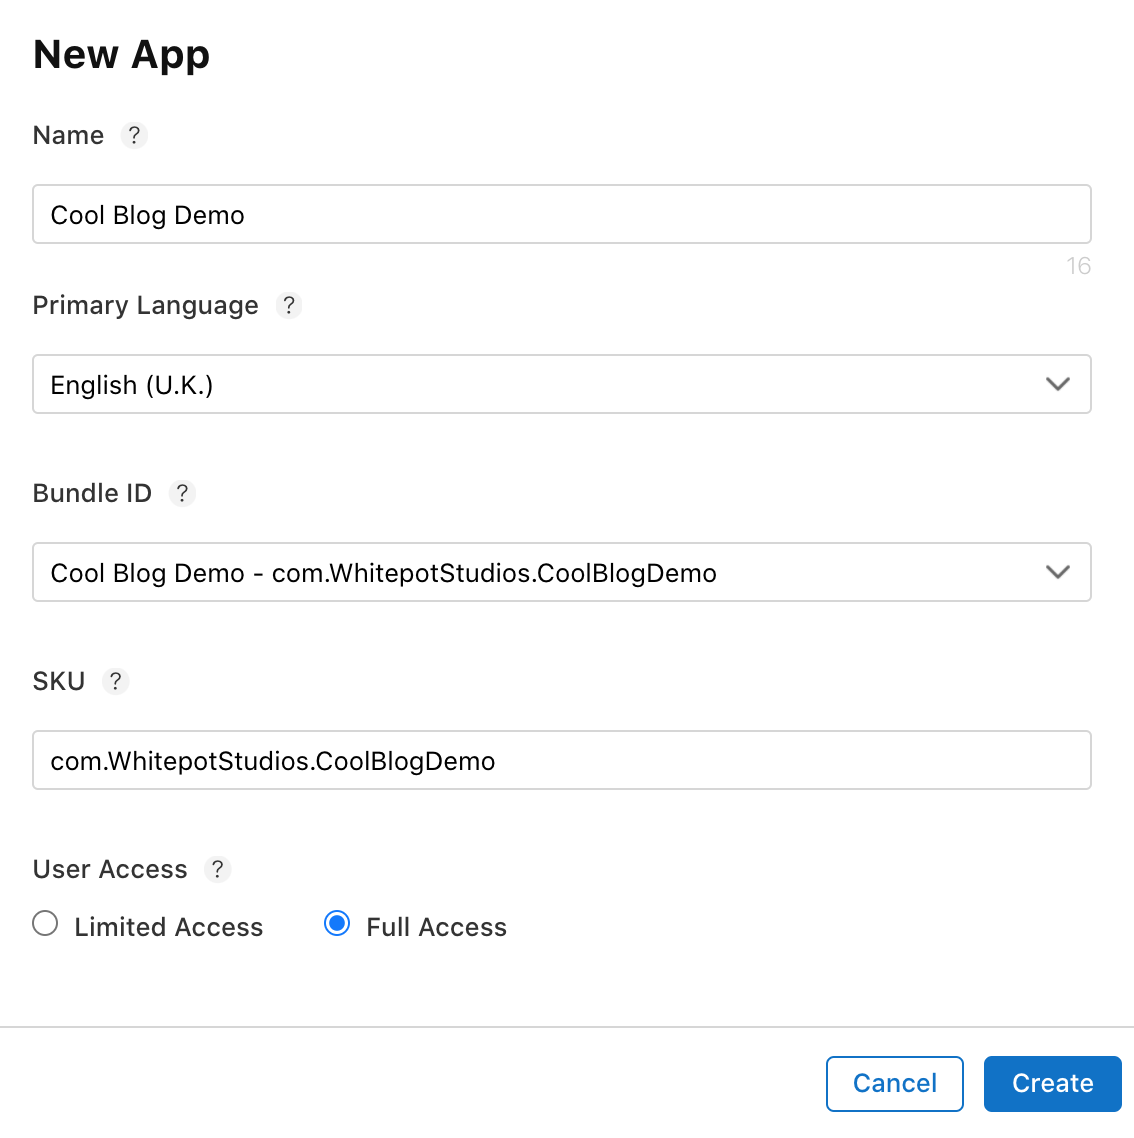
Creating the Bundle ID
Just as we did last month with the Android app, before you do any building, you’ll need to choose a unique bundle ID for your app – we’re going with com.WhitepotStudios.CoolBlogDemo again.
You create an ‘App ID’ first before making the app – and you can do this under Certificates, Identifiers, and Profiles: https://developer.apple.com/account/resources/identifiers/add/bundleId
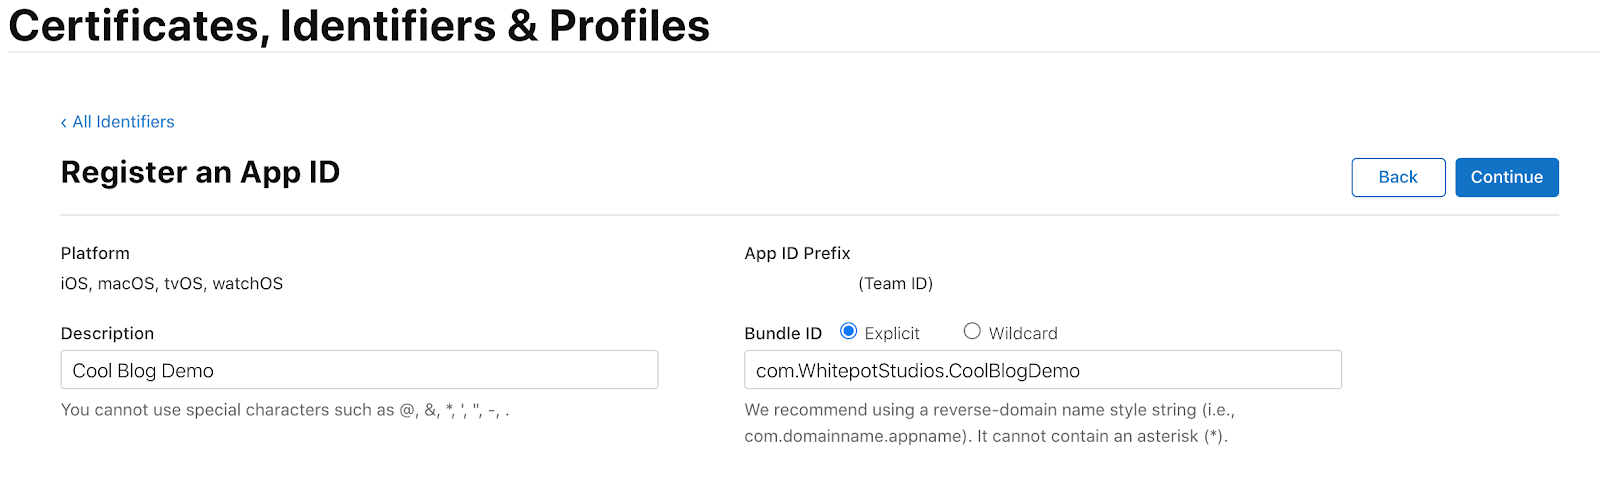
This is where you also choose the App Capabilities, like Push Notifications, etc. This can be changed later if you’re just setting up for now.
Create the app on the App Store Connect portal
Now you make the App back in the main App Store Connect portal Apps area, after making the App ID (bit counter-intuitive, right?). Hit the ‘+’ symbol to make a new app here: https://appstoreconnect.apple.com/apps
And that’s it made!
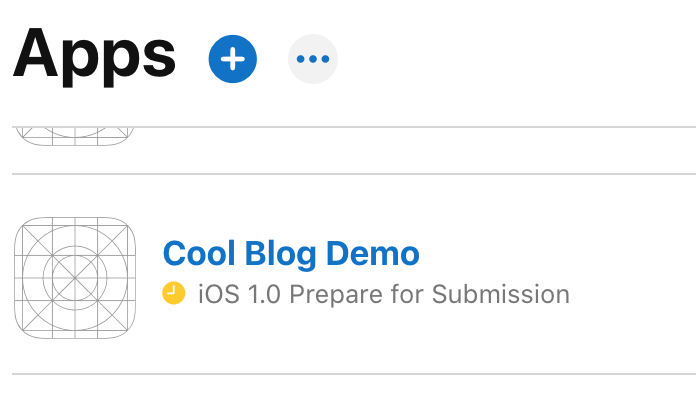
Click into your new App and go to the TestFlight tab – that’s where the first Build from XCode will go.
Building In Unity
Let’s go back to Unity – make sure your platform is set to iOS. For a full overview of what is required in Player Settings before building, Unity has you covered:
- https://learn.unity.com/tutorial/how-to-publish-to-ios-2019-3
- https://docs.unity3d.com/Manual/class-PlayerSettingsiOS.html
With those settings in place, ‘Build and Run’ and choose a name for your XCode project.

XCode
Setting up XCode
If you’ve selected ‘Build and Run’, XCode should now open automatically with your new project. In XCode, go to XCode > Preferences > Accounts to add the developer account you’ve set up.
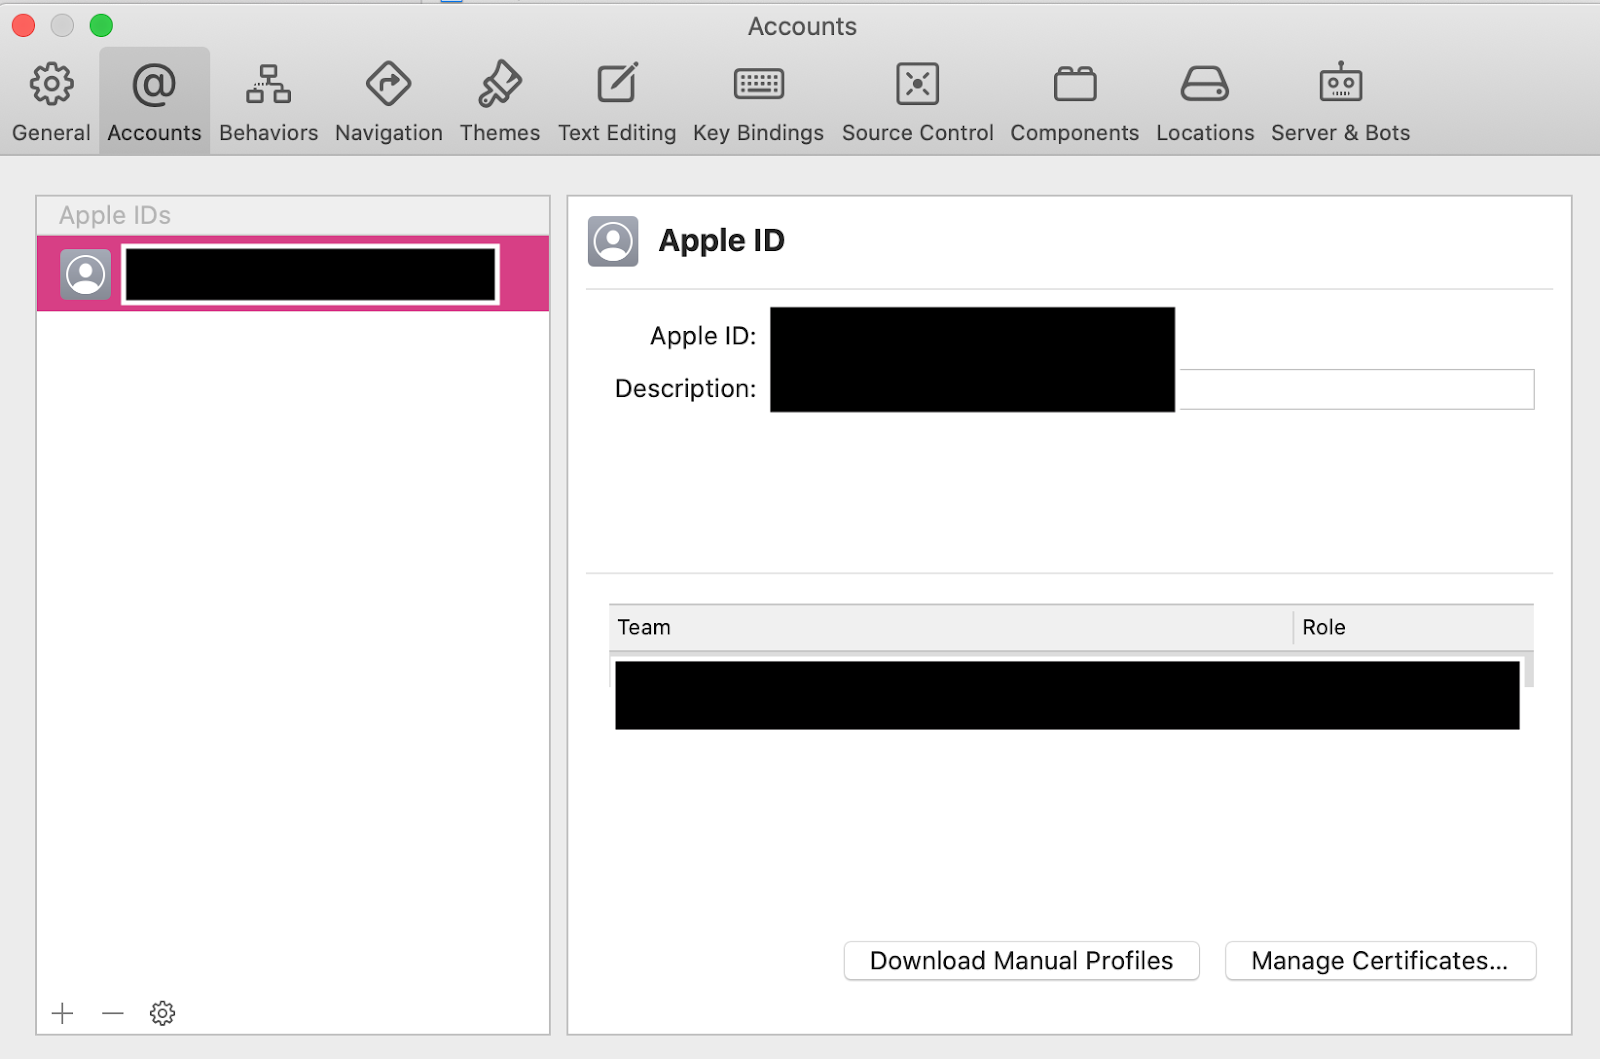
Signing in XCode
The XCode interface can be a bit confusing – so click ‘Unity-iPhone’ on the top left of the project, and then in the main window on the right, choose ‘Signing & Capabilities’.
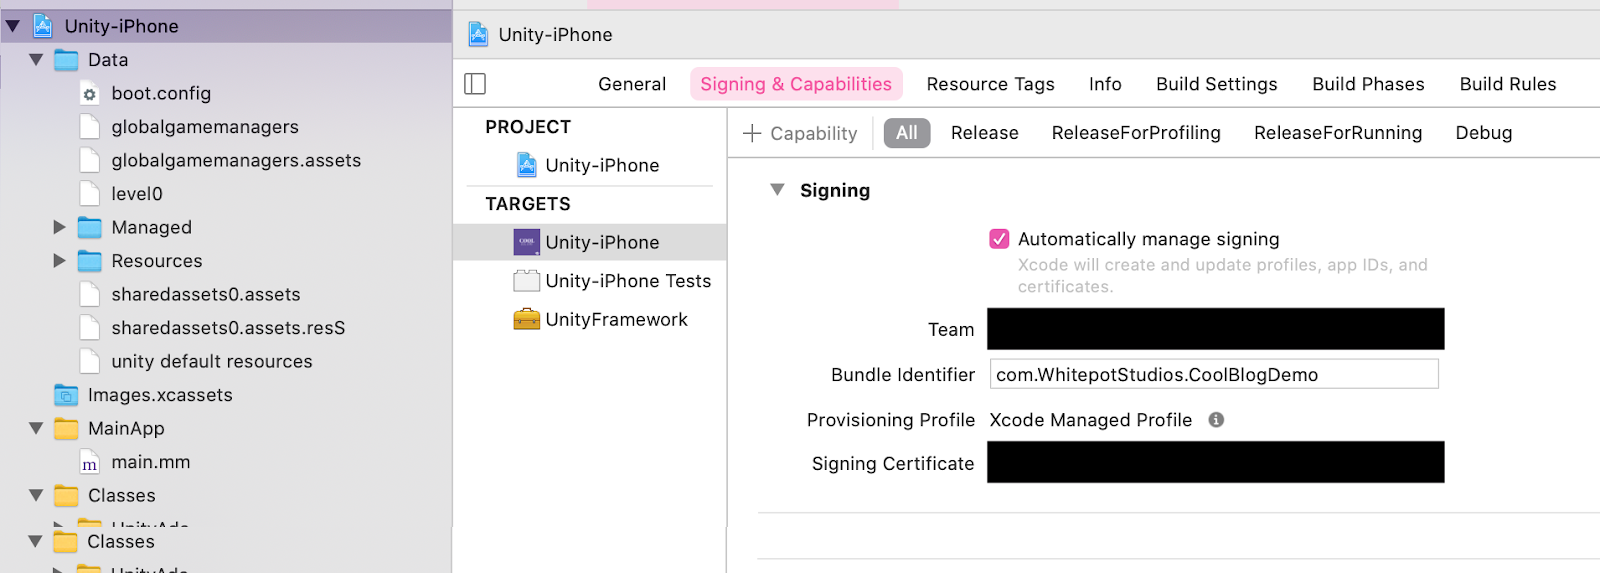
Tick Automatically Manage Signing and enter the Bundle ID you used on App Store Connect – in theory, things should go smoothly from here on out, with XCode grabbing your ‘Team Details’ from the Account you added in Preferences, and Signing Certificate being handled Automatically by XCode. If you’re having issues with this part, there’s a good detailed write-up here: https://instabug.com/blog/how-to-submit-app-to-app-store/
Building in XCode (Archive)
We now need to Build before uploading. On the top XCode menu, select Product > Archive.
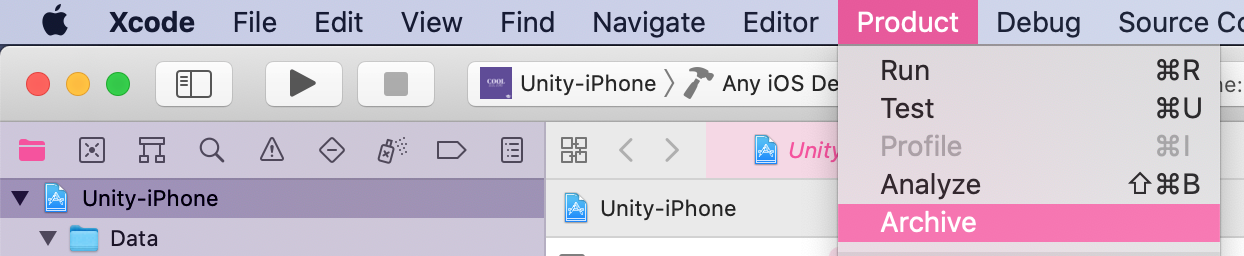
This can take a while, so be patient!

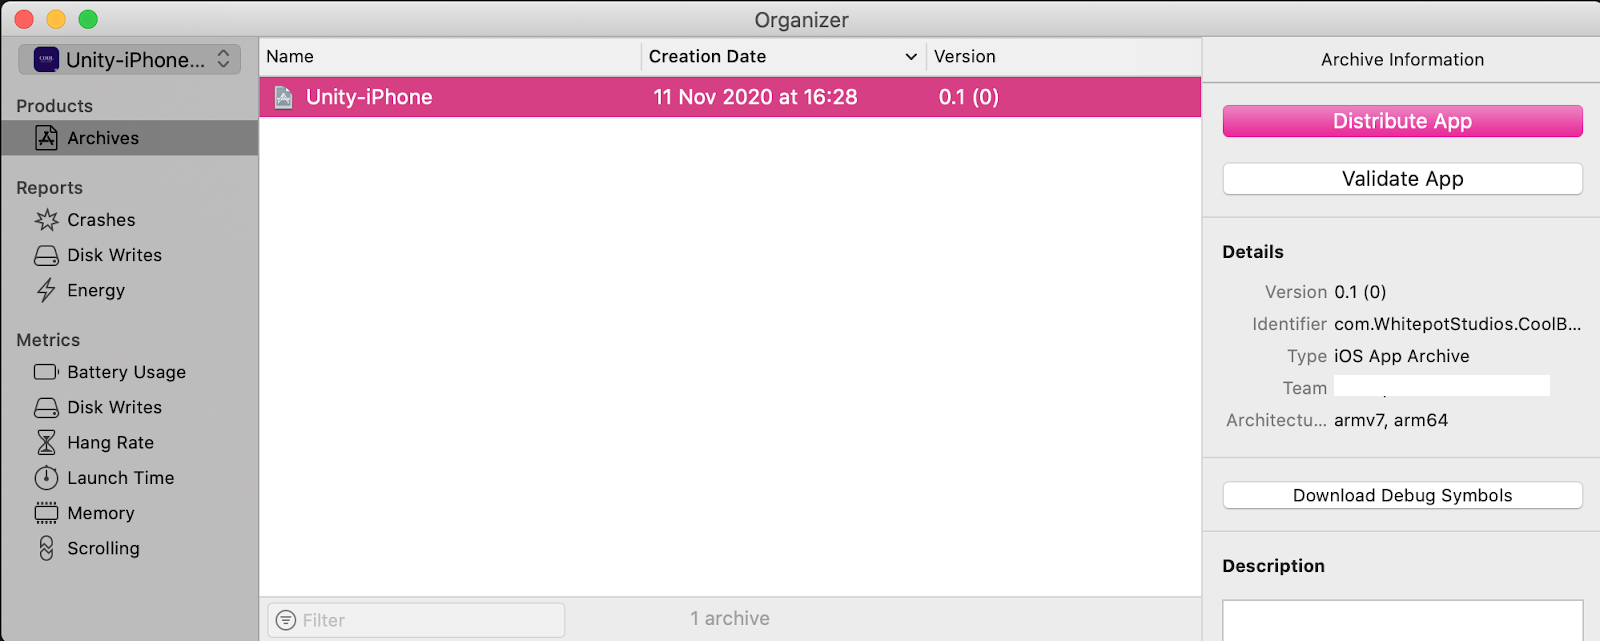
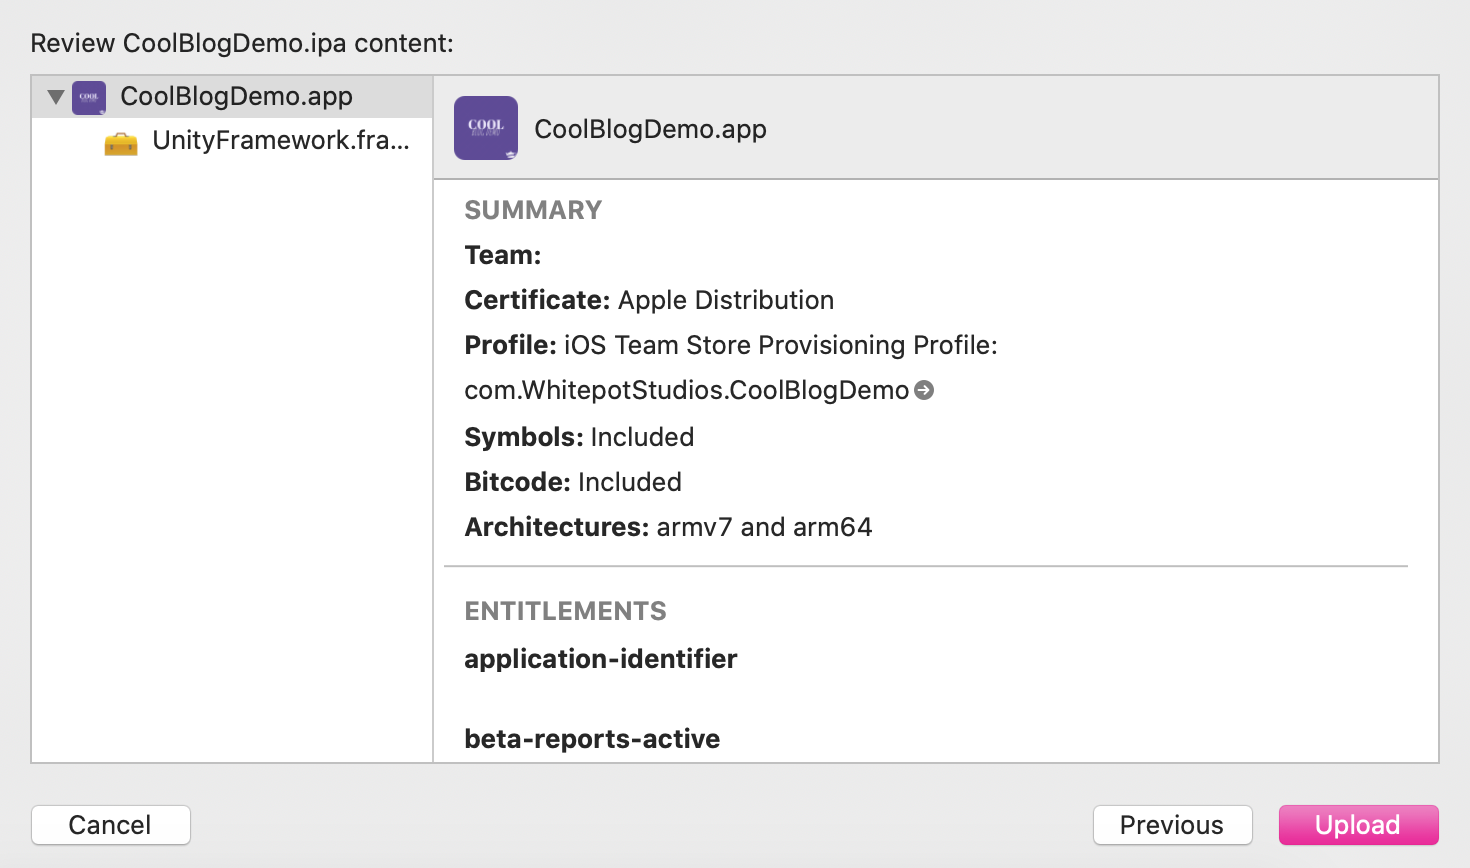
Uploading the Build (Organiser)
The Organiser is what we use to upload the build to TestFlight on App Store Connect. Once your build has finished ‘Archiving’, if the ‘Organiser’ doesn’t open automatically, go to Window > Organiser in XCode.
In the Organiser, select your newly ‘archived’ (built) app, and select ‘Distribute App’ on the right hand side.
There are a lot of prompts to follow:
- Select ‘App Store Connect’ as your destination followed by selecting ‘Upload’.
- Under distribution options, tick both ‘Include bitcode’ and ‘Upload your app’s symbols’
- Under signing options, pick ‘Automatically manage signing’ (again)
And then wait, as you’ll see this quite a bit (make sure you don’t minimise XCode and forget about it – because you’re not done yet!)
Finally, you should see one more confirmation screen – hit upload… and wait some more!

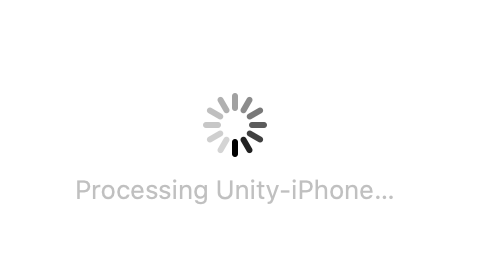
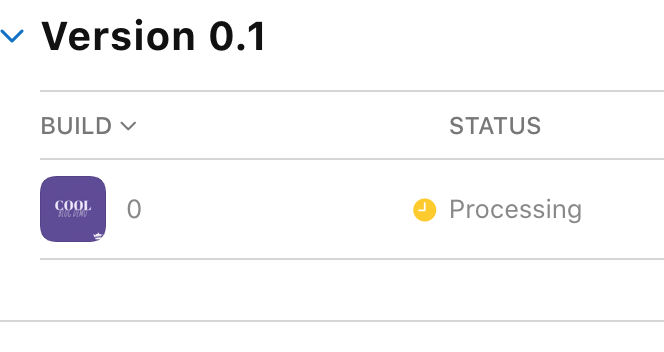
Successful Upload
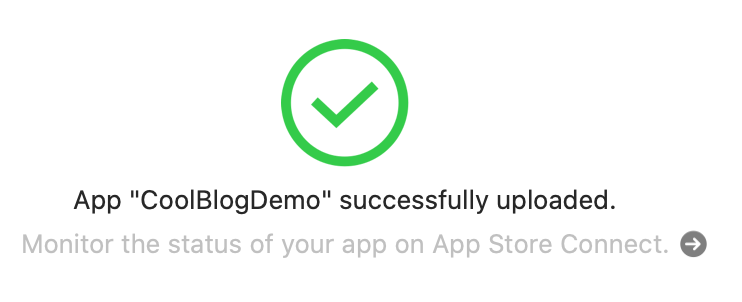
And… viola! You can now see your build in ‘App Store Connect’ under ‘TestFlight’. It’ll be ‘Processing’ for some time, but once that’s done, you can add testers.
Adding testers
There’s a great write-up here from Ray Wenderlich on types of testers, and how to add internal and external testers. To add external testers who have signed up, you’ll need to have this TestFlight build reviewed by a human being first – be sure to set time aside for this.
Export Compliance
Once processed, you may see a ‘Missing Compliance’ error regarding App Encryption. Click ‘Manage’ to answer the question prompt regarding this before starting Internal Testing. You can read more about this here: https://developer.apple.com/forums/thread/121183

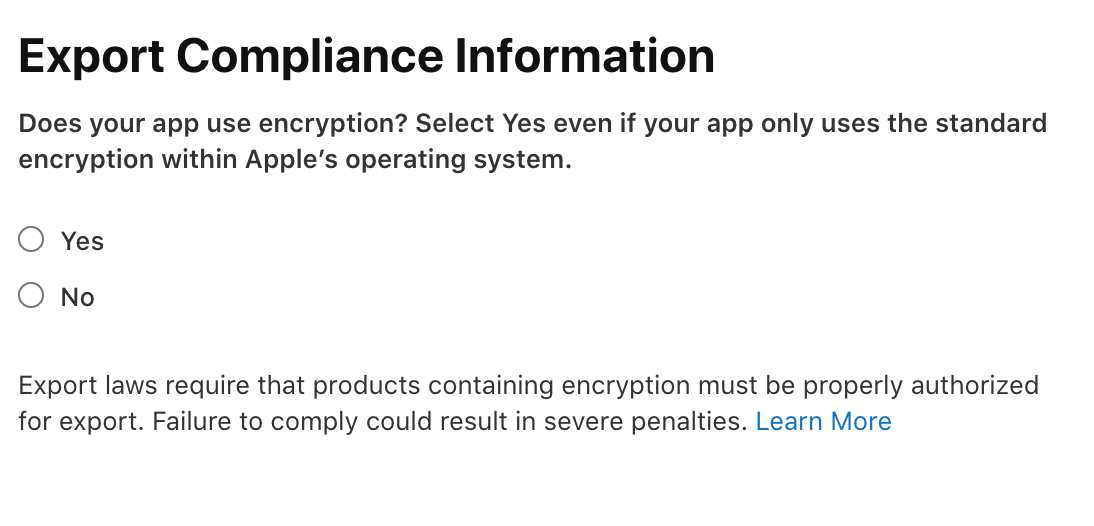
This is something you can set in future in your app’s Info.plist file via XCode, which Apple describes how to do here: https://developer.apple.com/documentation/security/complying_with_encryption_export_regulations.
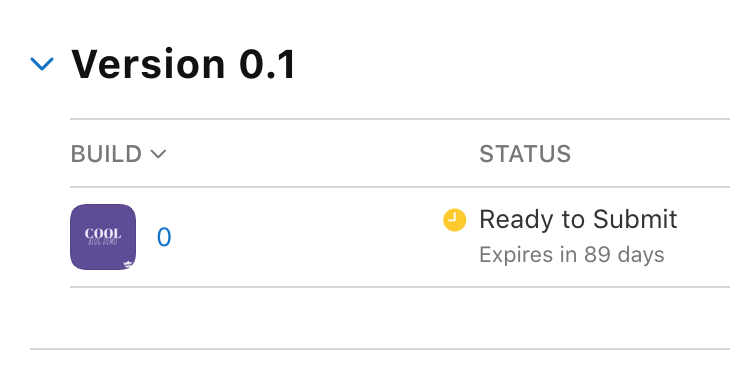
And with that done, your build is ‘Ready To Submit’
I hope you found that useful! Remember you can sign up to our StarGazing Alpha here: https://docs.google.com/forms/d/e/1FAIpQLSc7jXdolQYibBbu0TC2mXYcfX2NpNvDMPm034eZTE1r5-eBtg/viewform
Incase You Missed It
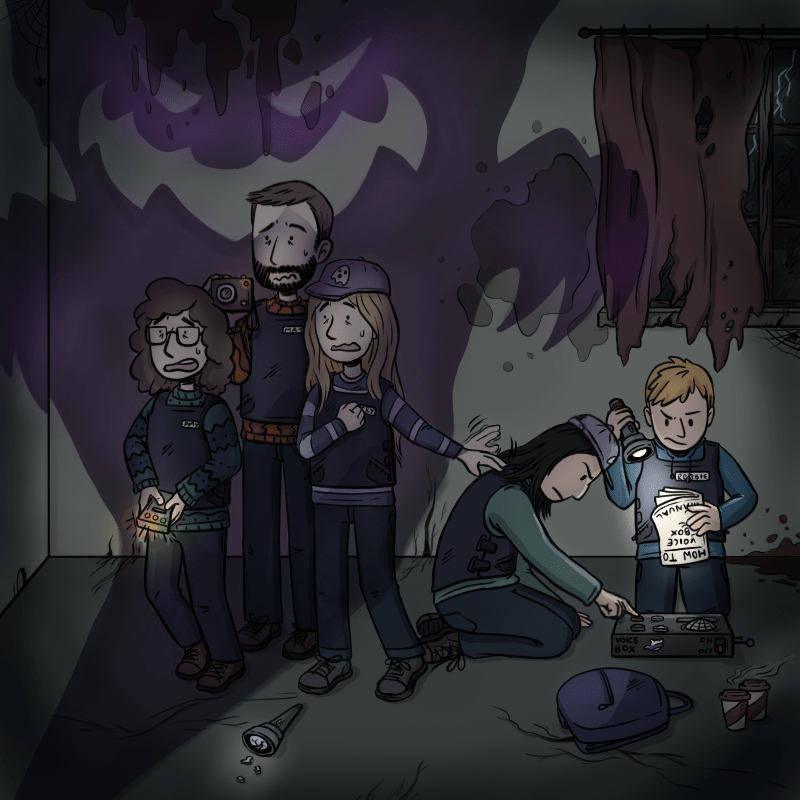
Last month was a spooky month so we need a spooky image to go with it. Check out our artist Amy’s charming illustration of the Whitepot Crew’s encounter with a scary ghoul.

Here’s what we’ve been reading, watching, listening to and playing the past month.
Adam: “This month I haven’t had much time to play or watch much but I did make some time for some spooky (and not so spooky) things on Halloween. I watched Hotel Transylvania, Poltergeist and The Ring, oh, and I got round to watching Matt’s favorite, Boss Baby. I enjoyed all them enough though I don’t think I was paying 100% attention to any of them (sorry Matt). In terms of games I’ve been getting spooked playing Phasmophobia with a group of friends and that’s about it. Other than that I’ve been painting some Warhammer and working away. Today (11/11) is my birthday so I’m going to have some lockdown cake!”
Vicky: “This month I have enjoyed celebrating my lockdown-Halloween-birthday, and carving some very mouldy pumpkins. I watched a bunch of films and left mediocre reviews about them on Letterboxd. I’ve also been indulging in some proper guilty-pleasure TV, finishing up the Married At First Sight AUS series and the UK one. Absolutely wild.”
Matt: This month I’ve been playing bits and pieces of different games, haven’t really found anything that enjoyable tbh. Some of the games that I did enjoy playing were Super Lucky’s Tale, Gears 5 and Moving Out. This month I’ve also been watching more than usual, I’ve been on an Ardman binge lately which is always great. I watched the new Spongebob, which was grand and I’d highly recommend His House and The End of the F**king World. I’ve been doing the odd personal work here and there over the past month also which you can check out on my artstation.
https://www.artstation.com/artwork/5X5aeP
Amy: “This month I’ve been playing some of the new Pokemon DLC and enjoying dandering about in the snow with my giant crow pokemon, and I’ve been listening to some new-to-me music from Sebastian Bohm after hearing his “Paint It Black” cover in the new Destiny trailer. His work is really cinematic and is great for some motivation! I’ve also been finishing up some knitting projects and starting on some new woolly adventures; I won’t bore you all with the details but I’m chuffed with a shawl scarf based off a pattern from the V&A Museum website, it’s very cosy and well worth the lengthy making time ”
Robbie: “I’ve seen some good TV over the past month. We got stuck into The Mandalorian season 2, which is as good as ever. We also watched Captain Fantastic and Trial of the Chicago Seven on Netflix, both worth a watch if you haven’t seen them. Been playing some FIFA 21 and Watch Dogs: Legion this month, as well as Celeste which is free on Game Pass at the minute. Finally, I’ve added some of my favourite music tracks from the year to our playlist for this month so make sure you also give them a listen!”

Whitepot Playlist
So since next month’s playlist will likely be Christmas-related we’ve decided to do a playlist of songs that were on heavy rotation throughout the year that was 2020. Please Enjoy 😀
One More Thing
So with the end of 2020 approaching fast we’re looking to change things up with the blog for our second year and we’d like to hear from you with any feedback you might have. So comment below with things you’d like to see from Whitepot Wednesday in 2021.
Chat to you next month,
Matt
0 Comments